🤝 Workday | Connect
With the Connect integration, candidates you find in public profile search are expanded to include the following information from your ATS.
Table of contents


With the Connect integration, candidates you find in public profile search are expanded to include the following information from your ATS:
Is this candidate already in my ATS as a prospect or applicant?
Their stage & status, and when they were last updated
The name of the recruiter who worked with them previously
View their email, phone number, and resumes/other attachments
Before You Begin
Note Please contact your Customer Success Manager or our support team so we can coordinate your integration setup.
Make sure you have access to the following APIs in Workday
Get_Candidates
Get_Candidate_Attachments
Get_Job_Requisitions
Get_Job_Postings
Setting up the Workday Integration
You will need to do the following in Workday:
Create a new ISU account
Create a new Security group
Add the ISU account to the security group
Add permissions to the security group
Activate your security changes
Copy your service endpoint
Copy your tenant name
Optional: Whitelist IP addresses
Create a new ISU account in Workday for your SeekOut integration
Login to Workday, search for Create Integration System User, and run the task. Enter a user name and password. Uncheck the box Require New Password at Next Sign In. Ensure that Session Timeout Minutes is set to 0. Click OK to create the new user.

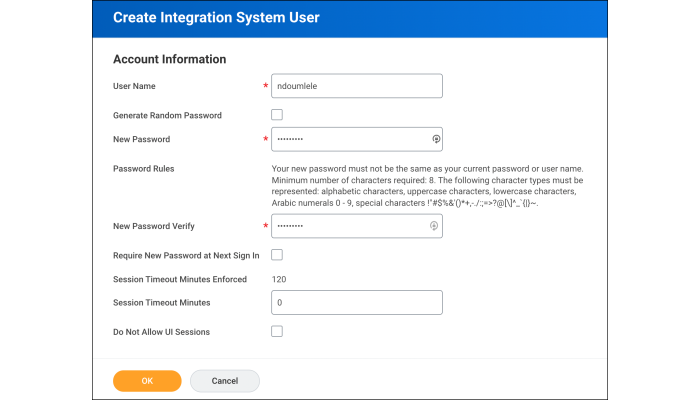
Copy the username and password somewhere safe; you will be entering this into SeekOut later.
Create new Security Group
Search for Create Security Group and run the task. Select Integration System Security Group (Unconstrained) from the Type of Tenanted Security Group dropdown, and name your security group something easy to remember like seekout2way. Click OK to go to the next step.
On the next page, use the search box next to the Integration System Users field to find your username. Make sure your username is added to this box. Click OK.
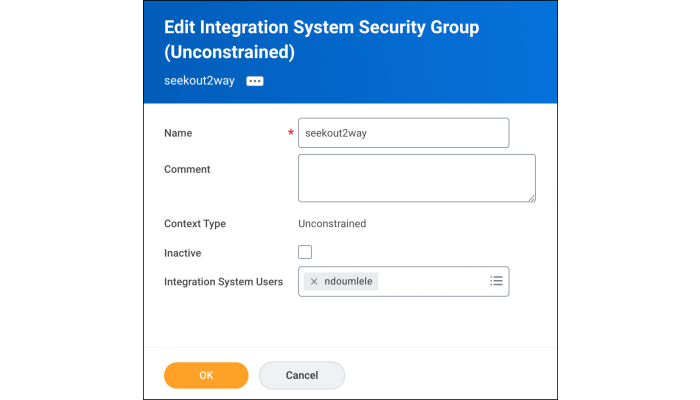
Click Done on the next page to finish creating the security group.
Add Permissions to Security Group
There are five permissions you need to add to your security group. You'll need to repeat these steps to add them one at a time.
1. In your Workday account, search for View Security for Securable Item and run the report. A pop up will appear.
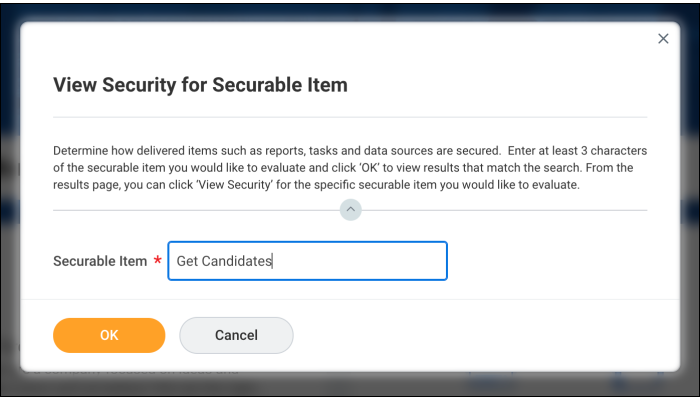
2. Enter Get Candidates in the Securable Item field and click OK. On the search results, click the three-dots next to Get Candidates (Web Service) (Web Service Task), then click Security, then View Security.
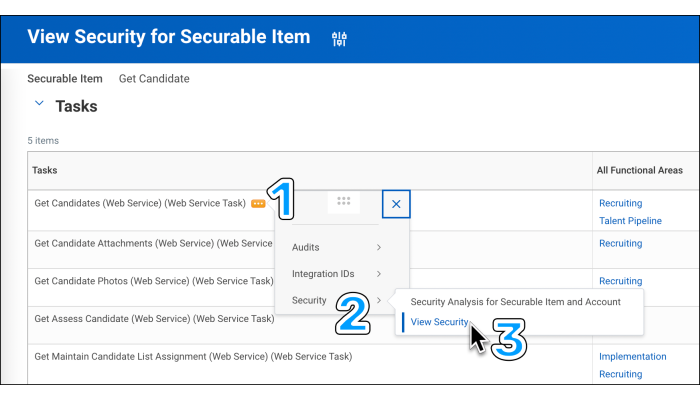
3. Click the three-dots next to Candidate Data: Job Application, then Domain Security Policy, then click Edit Permissions.
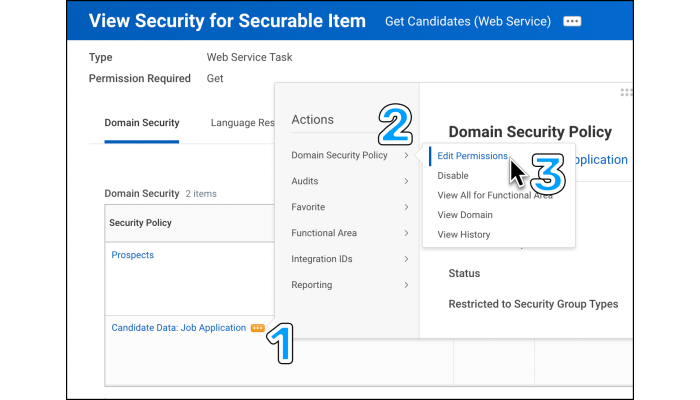
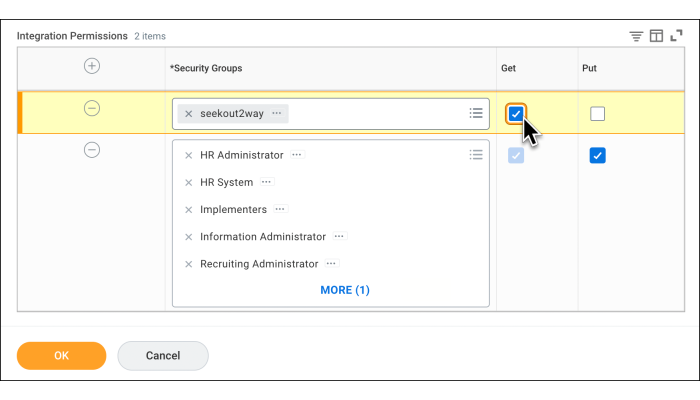
4. Scroll down to the Integration Permissions section and click the Plus + sign next to *Security Groups. Search for the seekout2way group and add it to the field. Click the checkbox under the Get column and then click OK.
5. Click Done to return to the list of policies for Get Candidates. Repeat steps 3 and 4, this time clicking the three-dots next to Prospects.
Repeat steps 2 - 4 with the following:
Search for the Get Candidate Attachments securable item
Click the three-dots > View > View Security
Find the policy Candidate Data: Attachments
Click the three-dots > Domain Security Policy > Edit Permissions
Scroll to Integration Permissions, add the seekout2way security group, check the box under Get, and click OK.
Search for the Get Job Requisitions securable item
Click the three-dots > View > View Security
Find the policy Job Requisition Data
Click the three-dots > Domain Security Policy > Edit Permissions
Scroll to Integration Permissions, add the seekout2way security group, check the box under Get, and click OK.
Search for the Get Job Posting securable item
Click the three-dots > View > View Security
Find the policy Job Postings: External
Click the three-dots > Domain Security Policy > Edit Permissions
Scroll to Integration Permissions, add the seekout2way security group, check the box under Get, and click OK.
Activate Security Changes
Search for Activate Pending Security Policy Changes and run the task. Enter a comment and click OK.
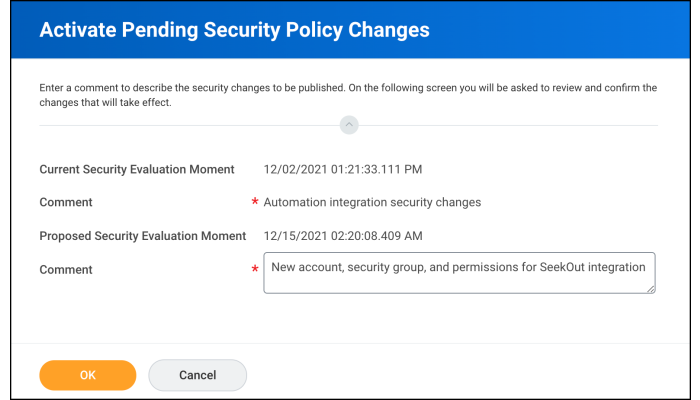
On the next page, check the box next to Confirm and then click Done to activate your new security policies.
How do I find my service endpoint?
In your Workday account, search for Public Web Services and view the report. Scroll down and click the three dots next to Recruiting: Public, then select Web Service > View WSDL. A new tab will open with an XML file.
Using the Find feature in your browser (press Ctrl + F if you are using Windows, or Cmd + F on a Mac), search for soapbind:address. The URL on this line contains your service endpoint.
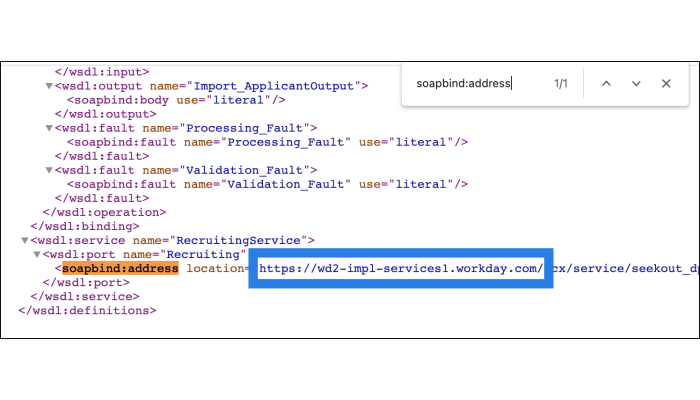
Copy the URL up to the trailing slash after workday.com and save it somewhere safe; you'll be entering this in SeekOut.
How do I find my tenant name?
Your tenant name is part of your url when you're logged into Workday. It's the text between the two forward slashes after workday.com.
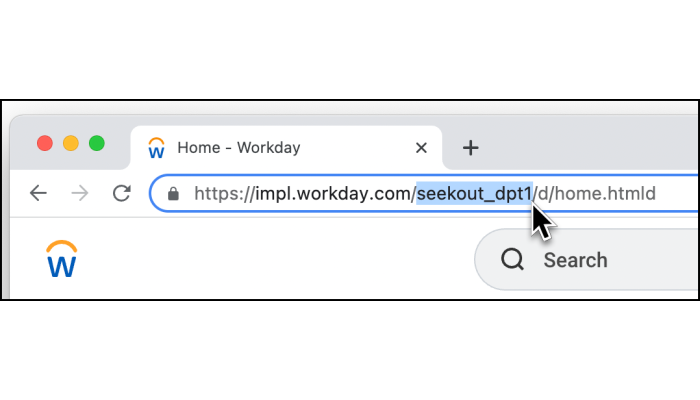
Copy your tenant name, be sure not to copy any of the slashes or any other part of the URL. Save this somewhere safe; you'll be entering it into SeekOut.
Optional: Whitelist IP Addresses
You can whitelist the following IP addresses that are used for the Workday <> SeekOut integration:
13.64.9.73 13.64.9.74 | 64.159.116.250 73.140.212.100 104.42.5.227 |
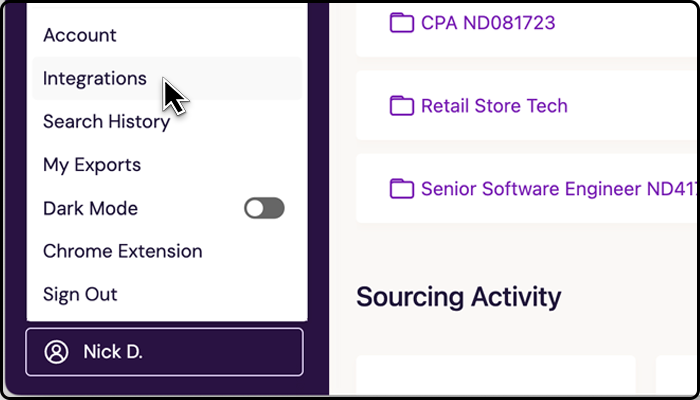
Accessing Integrations
Click your name at the bottom left of the SeekOut dashboard, then select Integrations.
Note: Don't see the Integrations option in your menu? Contact your Customer Success Manager or support@seekout.com and ask to enable ATS integrations for your org.
On the Integrations page, click + Add a Connection to open the list of applicant tracking systems. If you've set up an integration with SeekOut before, your current integrations will be listed on this page. Click the plus sign + at the top of the page to open the ATS list.

Connecting to Workday
On the Integrations page, click + Add a Connection. Locate Workday from the list of integrations and click the Connect button.
Note: If you have set up an integration previously, click the + next to the list of integrations at the top of the page to open the Add a Connection pop-up.
On the Capabilities tab, check the box next to Rediscovery. Uncheck the box next to Export. Click Confirm Choices to continue to the next step.
Review the requirements on the Permissions tab and click I'm ready.
On the Credentials tab, enter your service endpoint and your ISU password. In the UserName field, enter your ISU username, followed by @ and then your Workday tenant name.
Click Submit to save your credentials. SeekOut will automatically attempt to verify your connection. When successful, Workday will appear at the top of your Integrations page with a green check mark.
Removing the Integration
Click the horizontal three-dot button next to a connected integration to Edit or Remove the integration from your SeekOut account.
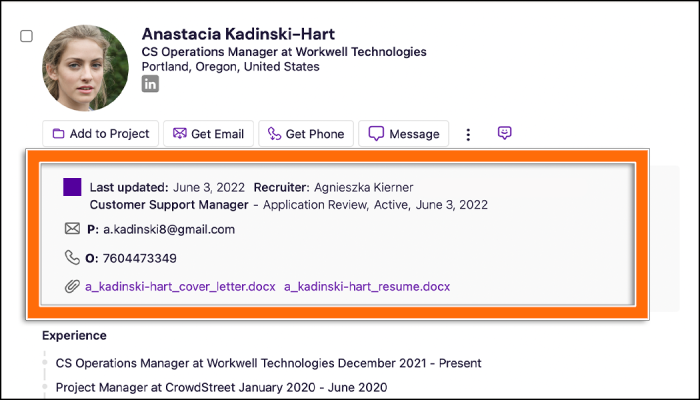
How to use Connect
Go to SeekOut search and select the Public Profile tab at the top of the page.
With ATS Connect enabled, profiles you find when searching in SeekOut will be enriched with additional information (highlighted in orange below) if the prospect is already in your ATS.
How Candidate Matching Works
SeekOut matches the profile data from your ATS with the up-to-date candidate profile in SeekOut. SeekOut will use ATS data you provide to do this match, including:
Name, company, title, or other fields
LinkedIn profile URL
PDF resume
We use this data only to find the correct person in SeekOut and note whether they are in your ATS or not. This information is not shared with any other SeekOut customer and is deleted once the match is attempted.
This matching process happens regularly (typically daily or weekly, depending on your ATS) so new candidates in your ATS are always matched with their profile in SeekOut.